
Making Music
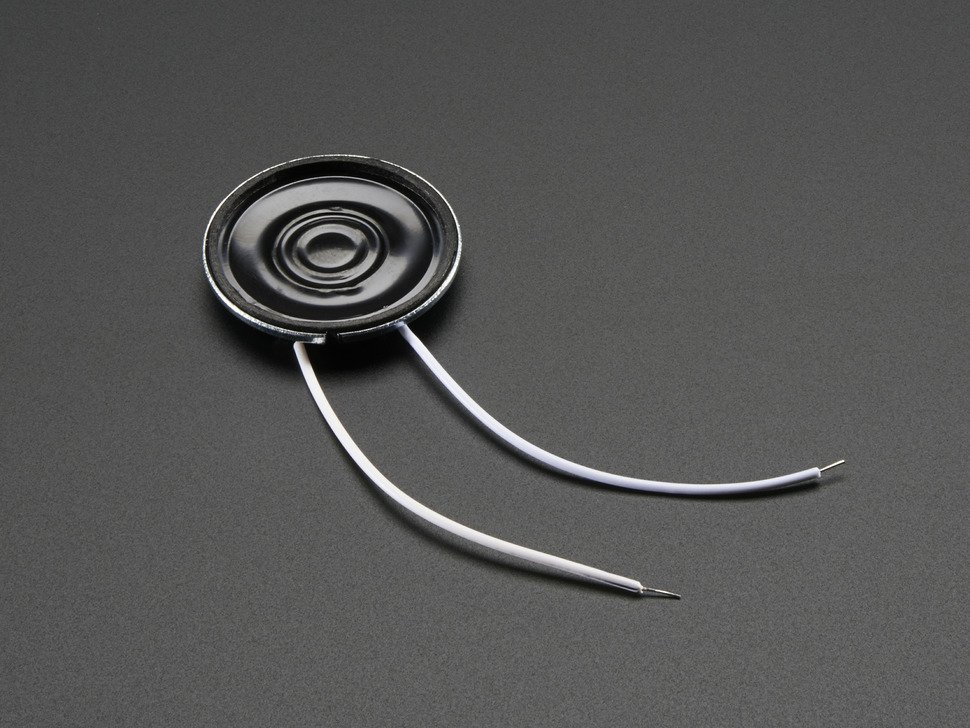
Your kit includes a tiny audio speaker  .
You can use the speaker with your Arduino to make sounds and even play music.
.
You can use the speaker with your Arduino to make sounds and even play music.
You can connect your speaker to one of the arduino digital pins (red wire) and ground (black wire) and use the tone() function to generate sound! Because the wires on the speaker are very thin, it may be hard to get them into the holes on the arduino or breadboard. You can try using one lead from a resistor to push them in or ask a mentor or senior student for help. If needed, we can solder thicker wire leads to the ends of the speaker wires.
- The simple overview
- Another approach that's more complex, but more instructive
- a music program
- music with volume control
Exercises:
- Make a sound
- Play a song (use an array for the notes and lookup tables for the frequencies)
- Use switches to make an instrument
- Examine the signal being sent to the speaker using an oscilloscope
- NOTE: later, we'll build a Thermin
Sound
Pure tones, such as the sound made by a key on a piano, rise and fall in a sinusoidal pattern (sine wave). Humans can typically hear sounds between 20Hz (sound rises and falls 20 times-per-second) and 20kHz (20,000 times per second); as we get older, we lose the ability to hear some of the higher frequencies which is why mosquito ring tones were invented. With most of the projects above, your Arduino has been making tones by turning the speaker on and off at some frequency. The sound isn't great because we are using digital outputs to control the speaker; the outputs can only turn on or off, creating a square wave, not a sinusoidal pattern. However, in the last project above you used an analog output that can vary the amplitude of its signal...this can be used to make better and different sounds as you'll see below.
When you create more than one pure tone at a time, such as when you play a chord on a piano, the different sound waves interact, add or subtract from each other and the result is a complex waveform. Noise cancelling headphones work on this principle (they generate sound waves that are 180-degrees out of phase with the sounds around you so that when they mix, they cancel each other out.
Your Arduino makes it easy to generate a single tone (using the tone() function), but it can also generate sounds that consist of multiple tones (this is called polyphony). Generating polyphonic music is more complex and there are several different approaches:
- Use a library like Playtune, that generates several tones at once (each on a different pin) using dedicated Arduino hardware timers and then combine (add) the outputs together through series resistors to feed the speaker. This is called additive synthesis.
- You can also use math to calculate the proper output; for example, calculating the amplitude of each tone and then adding the amplitudes together in software before sending the sum to the speaker. This is called direct synthesis. Because some of the math calculations are complex and an small computers like an Arduino might not be able to perform them fast enough, we often use tables of pre-computed values to help generate the desired values; this is called wavetable synthesis. As digital hardware has gotten faster and faster, Direct Digital Synthesis is now a very popular way to generate waveforms.
project presents various approaches for generating polyphonic sound using an Arduino.
MP3 Player?
WAV files contain discrete measurements of the amplitude of sound waves you can turn an Arduino into a .wav file player or make it play back sounds you have recorded on your PC or perhaps yoda
Advanced Projects
better sound text to speech Make a polyphonic synthesizer
Attachments (1)
- speaker.jpg (128.6 KB) - added by 6 years ago.
Download all attachments as: .zip