
Smorgasbord
Stepper motors
 Stepper motors move in small, discrete steps and are useful for a wide range of precision positioning. They used to be used in mechanical disk drives (soooo 1990s) to position the disk's head at the desired track. 3D printers use stepper motors to position their extrusion heads and platforms accurately. The team has a number of BYJ48 (small 5v 4-phase) stepper motors with ULN2003 driver boards for you to experiment with. Each step is 1/64th of a rotation.
Exercise: follow this instructable to connect a stepper motor to your Arduino and control it.
IR Proximity Sensors

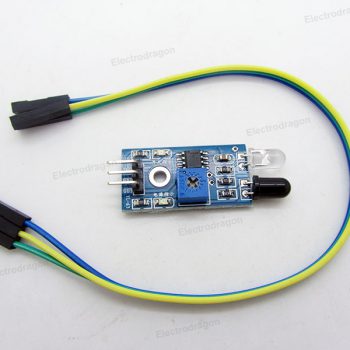
- IR proximity sensors provide a very inexpensive way to detect objects at a fixed distance. You configure the sensing distance with a potentiometer. The module then outputs a 1 if an object is closer than that or a 0 if not. IR sensors are useful because they are very inexpensive and require very little processing power (no distance calculation is needed).
Exercise: Ask a mentor for an IR proximity sensor and connect it to your Arduino. Use the IR sensor as a proximity warning (e.g. to keep your robot away from walls)
Serial Communications
- Serial communications note: requires a TTL-to-RS-232 adapter - ask a mentor.
- Software Serial (aka bit-banging)

- Software Serial (aka bit-banging)
- Serial interfaces use a small number of wires (usually 3) to carry information between devices. The information is encoded as a sequence of digital bits (high or low voltages) sent sequentially at a fixed, mutually agreed rate. Your Arduino has a hardware serial interface that can be used to send information to your desktop computer and receive information from it. You can, for example, display debug output or give your Arduino a command prompt.
Exercise: send information (e.g. distance as measured by an ultrasonic rangefinder) to your desktop computer using a TTL-to-RS232 serial converter and software on your PC such as PuTTY.
LCD Displays
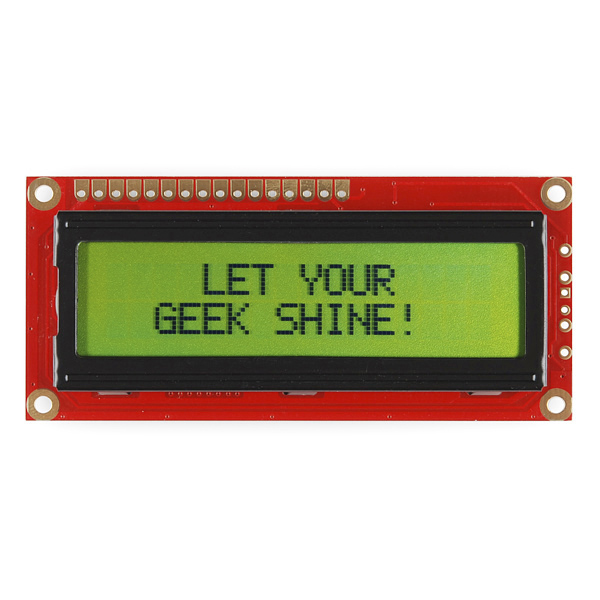
 For low power portable information output, it's hard to beat LCD displays. The team has a small number of LCD-1602 display modules which can display 16 characters x 2 lines of text. It is amazing how helpful it is on an embedded system (like a robot) to have a status display. If you add a few buttons, you have a powerful, built-in user interface; printers often use a 2-line LCD with 4 buttons for configuration and status.
These displays run on +5v which your Arduino can supply and use the industry standard HD44780 controller. Programming the LCD controller can be complex, but fortunately Arduino provides libraries to make it a breeze.
IR Remote Control
 Most remote controls use LEDs that emit infra-red light. They use a technique called On-Off Keying (OOK) which turns an infra-red LED on and off 38000 times per second (38kHz). When the LED is active (turning on and off at 38kHz), a '1' is being transmitted. When the LED is turned off, a '0' is being transmitted. An IR receiver detects this signal by filtering out all signals that are *not* changing at 38kHz; the receiver output goes high when a 38kHz signal is being received and low otherwise. You can (and should) read about this here.
The team has a set of IR receivers that you can connect to your Arduino. If you're clever, you can then use your favorite TV remote control to direct your mini-bot! You can learn more about how to do this using this instructable. Other tutorials are here and here. Note that you should add a capacitor (as big as 47-100uF) between +5v and GND as close to the IR receiver as possible; this reduces the impact of power supply noise.
Accelerometer/Gyroscope/Magnetometer
 The team has a low cost ($3-4) Invensense MPU6050 3-axis gyroscope/accelerometer (aka Inertial Management Unit or IMU) aka 6DOF sensor. You can read about it and how to program it here or review this excellent tutorial. The datasheet is here and more information is on Jeff Rowberg's page here.
Because it is very inexpensive, it is used in many robotics projects such as a self-balancing robot. An IMU can be valuable to give a robot a sense of balance and direction (e.g. for navigation). This is particularly important for flying bots where yaw, pitch, and roll must be tracked. The MPU6050 can be used with the RoboRio or cRio. 6DOF sensors are also used as human interface devices. Using an xDOF sensor may require calibration. On a mini-bot, an accelerometer can detect motion in any direction. IMUs provide valuable information about speed and direction that can prove superior to wheel encoders which are susceptible to wheel slip.
For advanced topics, investigate inertial navigation wherein, from a known starting position/location, you can track changes in orientation and motion to navigate. Googling will yield many papers on inertial navigation using IMUs.
Magnetometers are digital compasses; the Honeywell HCM5883 is a very popular magnetometer that is easily connected to an arduino; see here. When you combine an accelerometer, gyro, and magnetometer, you get a 9DOF sensor that is immensely useful for navigation.
Other Topics
- LEDs and speakers for input
- Speaker as microphone transistor preamp
- OpAmps 101 EEVBlog tutorial
- Capacitors, Inductors, and Resonance
- LIDAR Point Cloud tutorial
- 6 or 9DOF sensors
Attachments (4)
- IRremoteReceiver.jpg (18.5 KB) - added by 6 years ago.
- 16x2LCD.jpg (90.0 KB) - added by 6 years ago.
- bitbang.jpg (20.8 KB) - added by 6 years ago.
- IRdistanceModule.jpg (16.4 KB) - added by 6 years ago.
Download all attachments as: .zip